Partner Management
Guide for managing customer information (Customer/Agent) in the CRM system.
🚀 Access Customer List Screen
- On the main screen list, click
Partners→ selectCustomerstab.
🔍 Check if Partner Already Exists in System
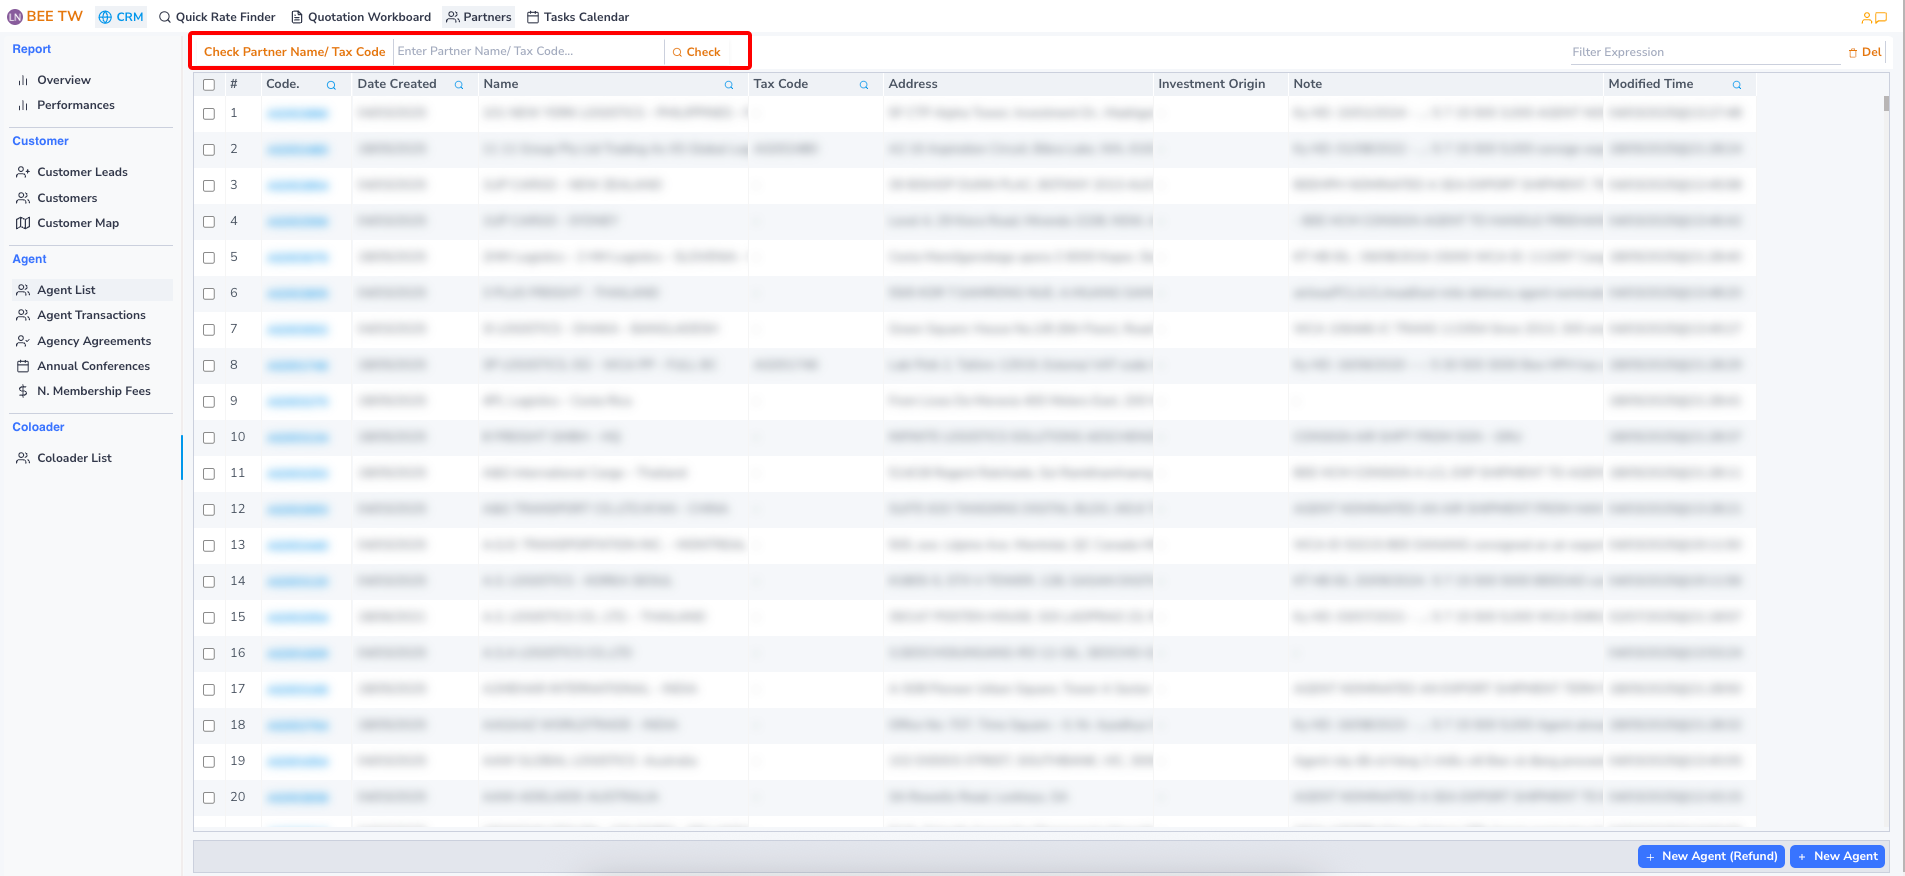
Enter Tax Code or Name then click the Check button to verify.
- If Customer is not in the system, screen displays message: No partners found with the provided tax code.
- If Customer already exists, screen displays existing Customer information.
➕ Request New Customer Creation
Step 1: Create new customer request
- Click
+ New Customeron the toolbar.
Step 2: Submit request
- Click
Request Partnerto send customer creation request and wait for approval.
Video demo: https://youtu.be/bzcGl9HGibY
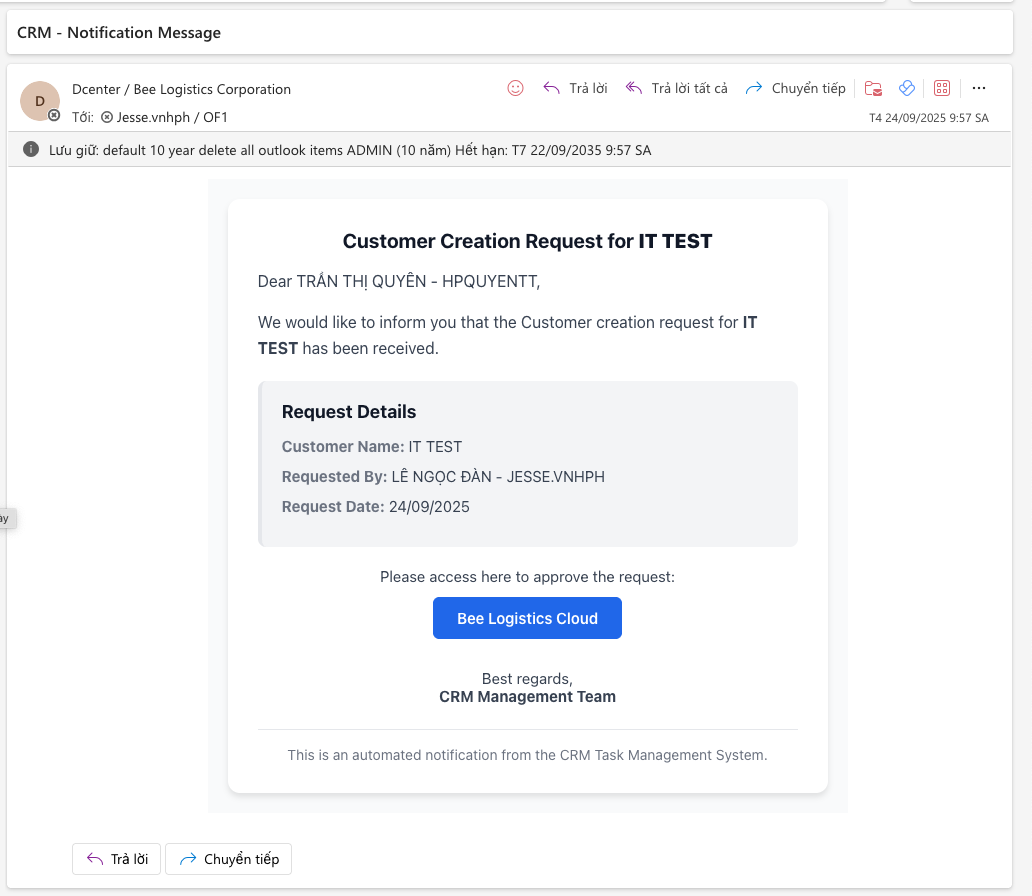
After customer approval, the code format will be automatically updated to [CSxxxxx_TEMP]. An email notification will be sent to sales informing about customer approval or rejection.
🔄 For Existing Customers with Previous Code
For customers already existing in the system:
- Click
New Customer - Enter Partner Code or Tax Code in the search box to find Partner and wait for system to load information and update notification.
- After system shows success notification, click close screen. (Do not click
Request Partner)
💰 Request New Customer Creation (Refund)
Step 1: Access refund customer creation
- Click
+ New Customer (Refund)on the toolbar.
Option 1: Manually fill in detailed customer (Refund) information.
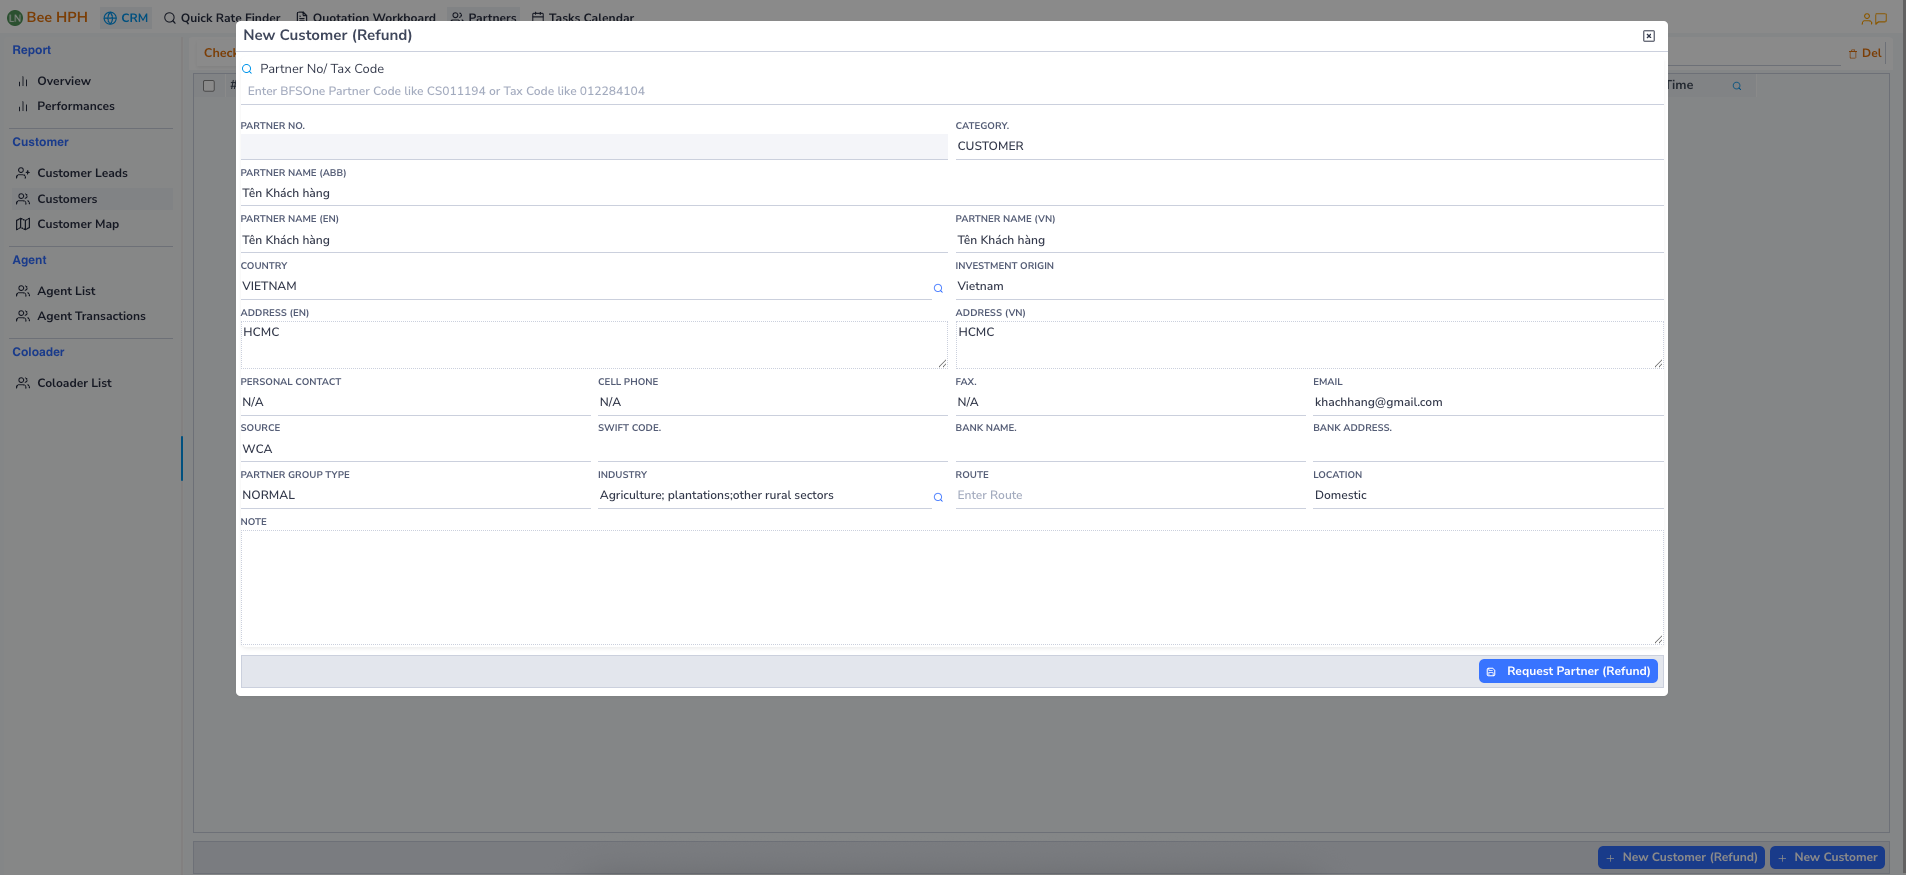
Option 2: Enter existing customer code from the system:
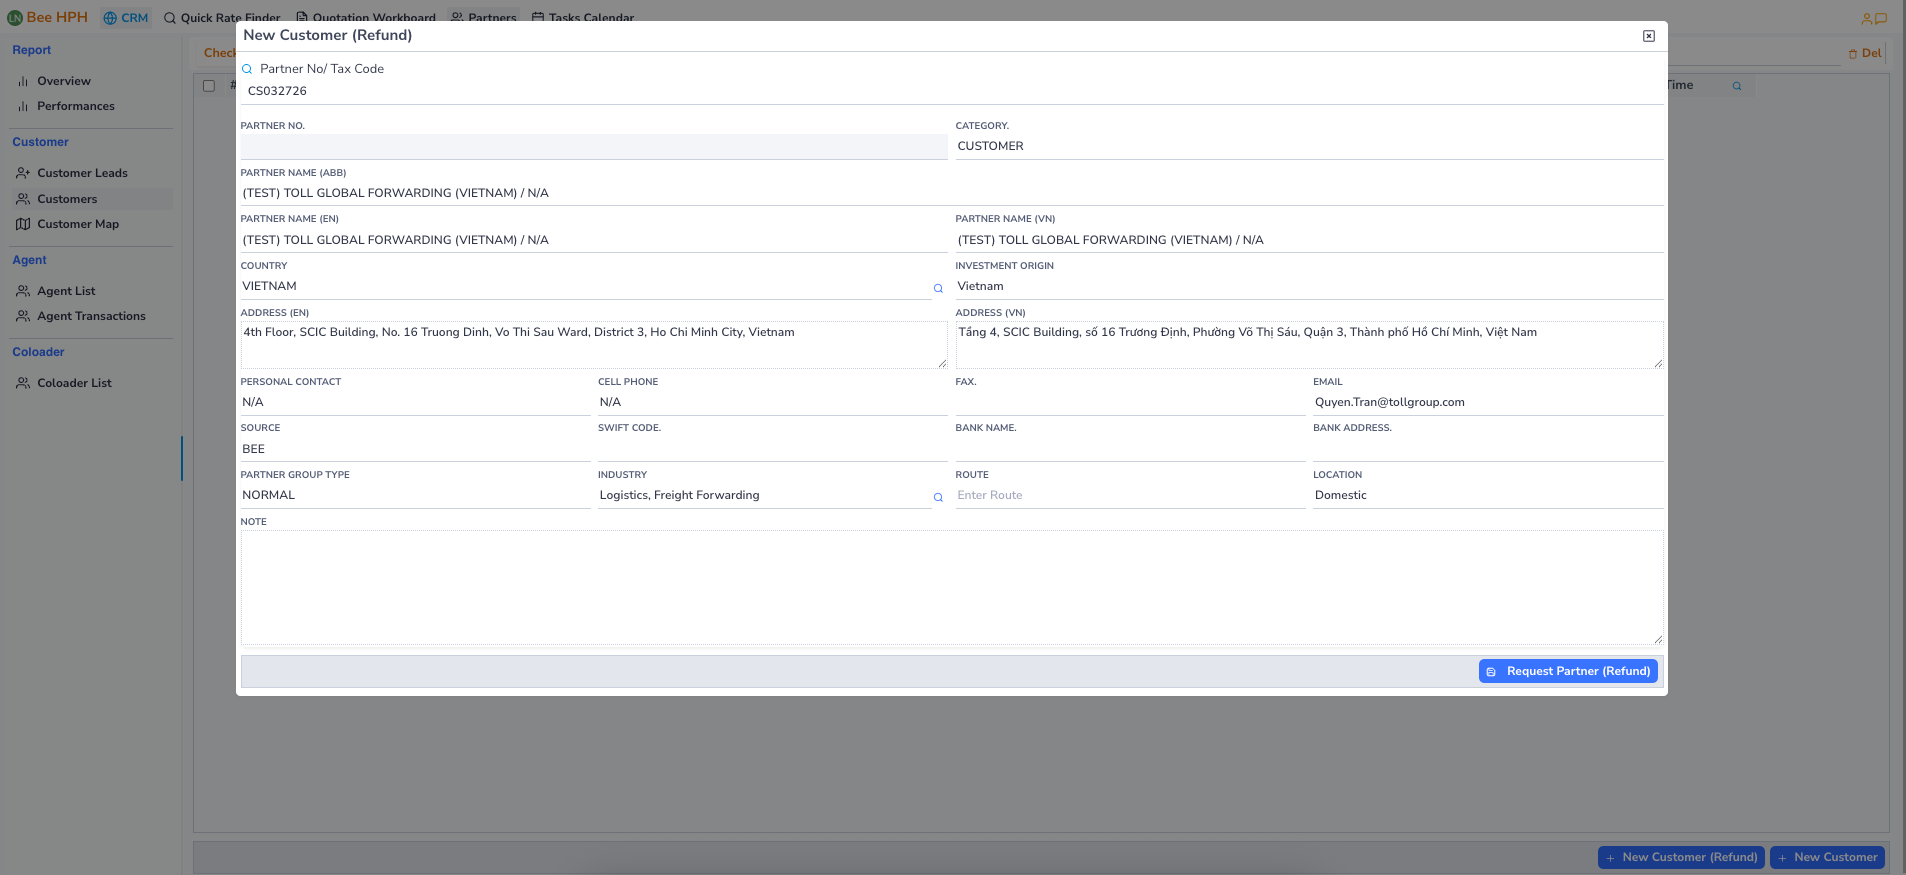
Step 2: Submit refund request
- Click
Request Partner (Refund)to send customer (Refund) creation request and wait for approval.
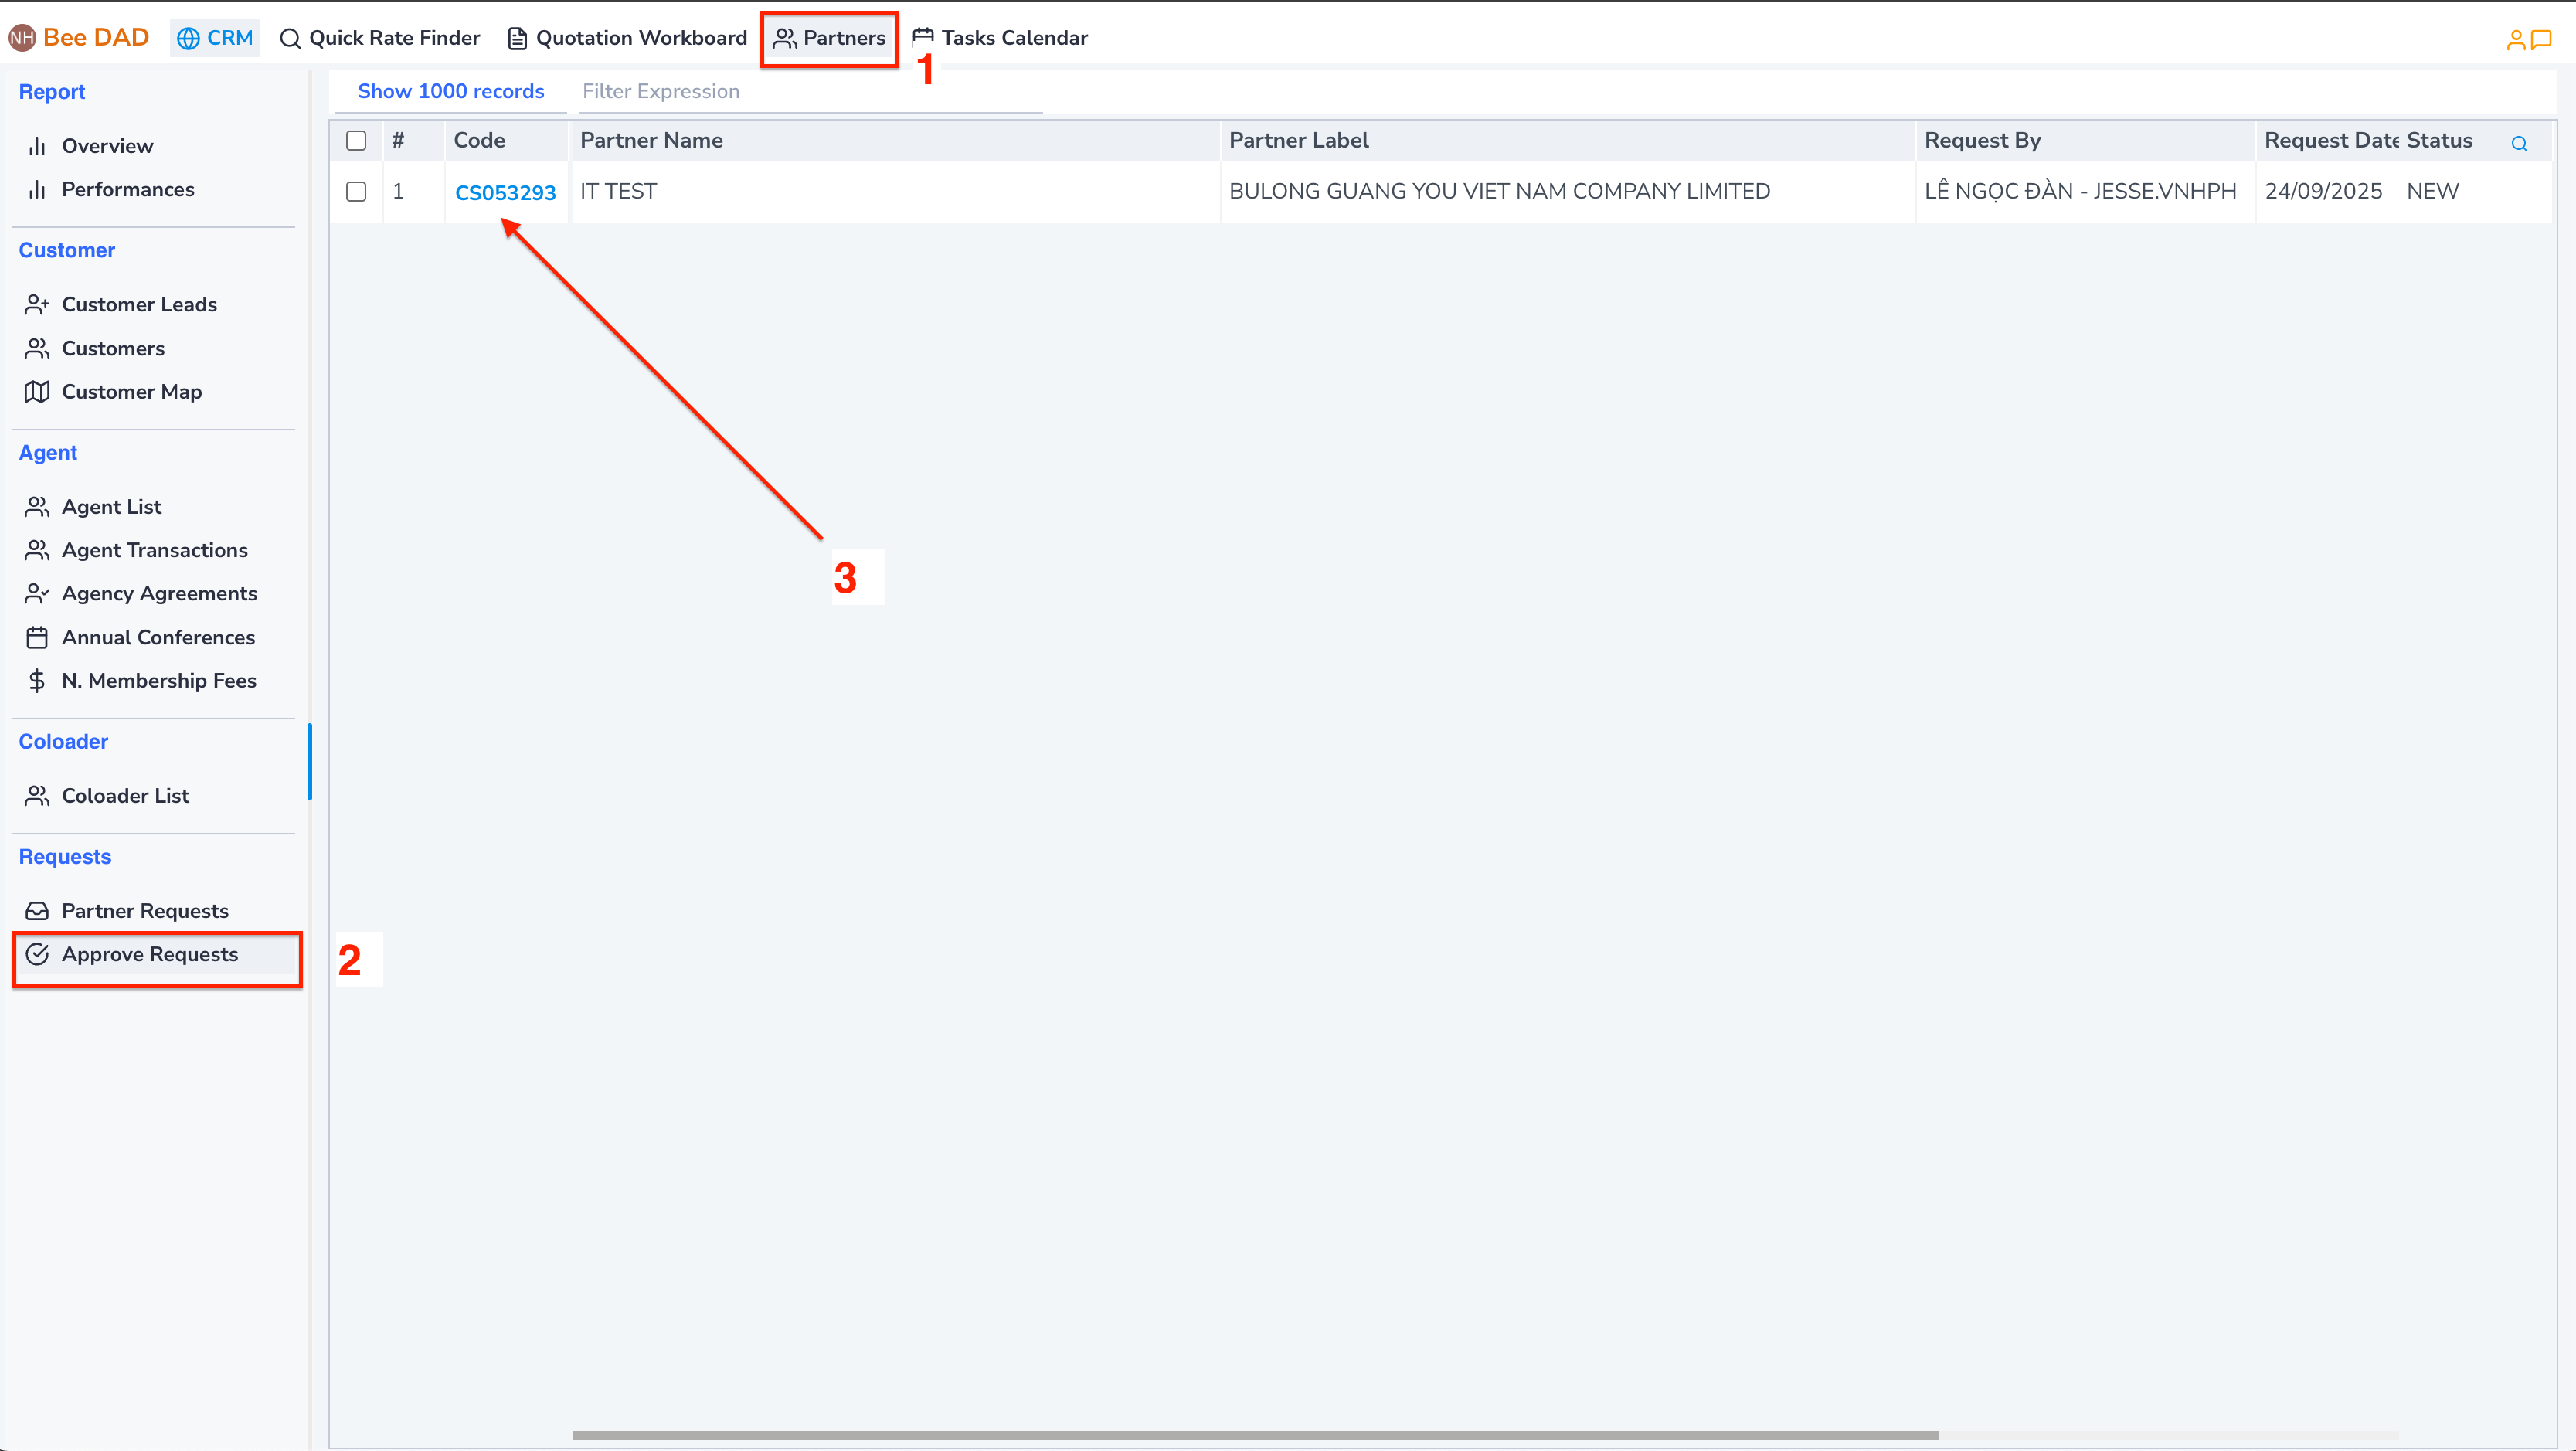
✅ Approve Partner Request
🚀 Access Approval Screen
- On the
CRMmain screen list, clickPartners→ selectApprove Requeststab.
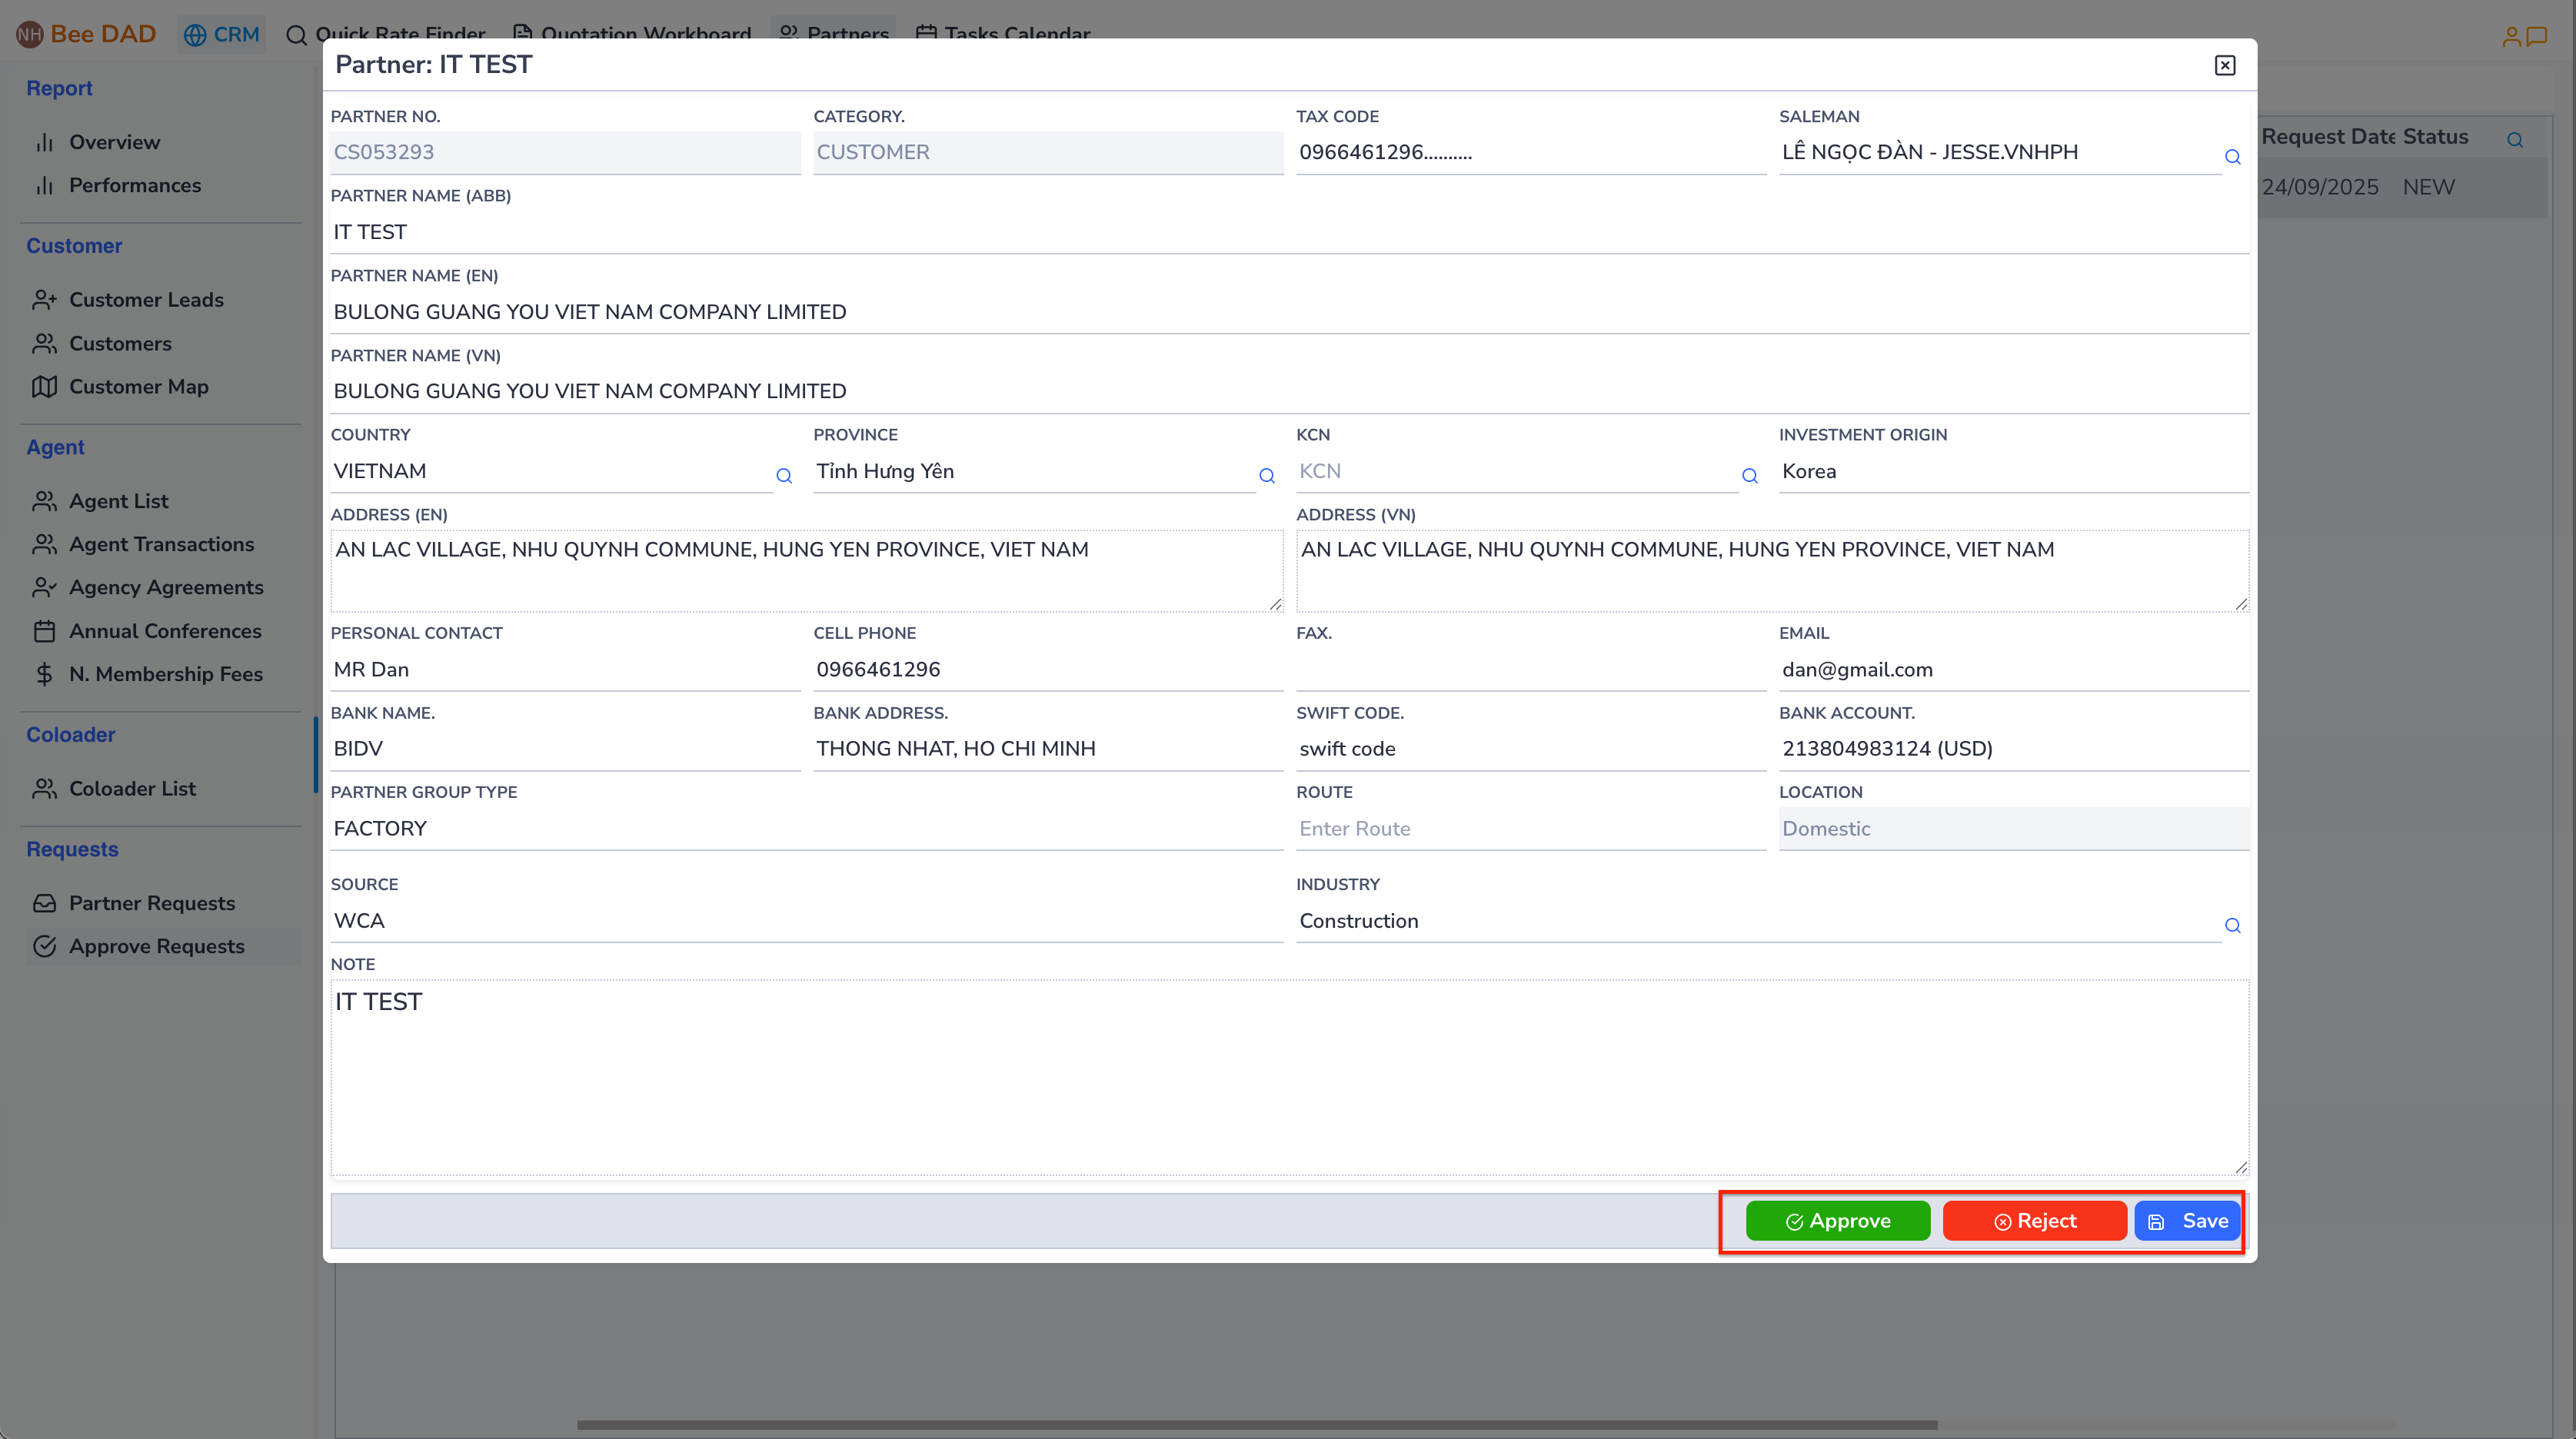
⚡ Approval Actions
1. Approve (Accept)
- Accept new Partner creation
- System will automatically:
- Generate Partner code with format [CSxxxxx]
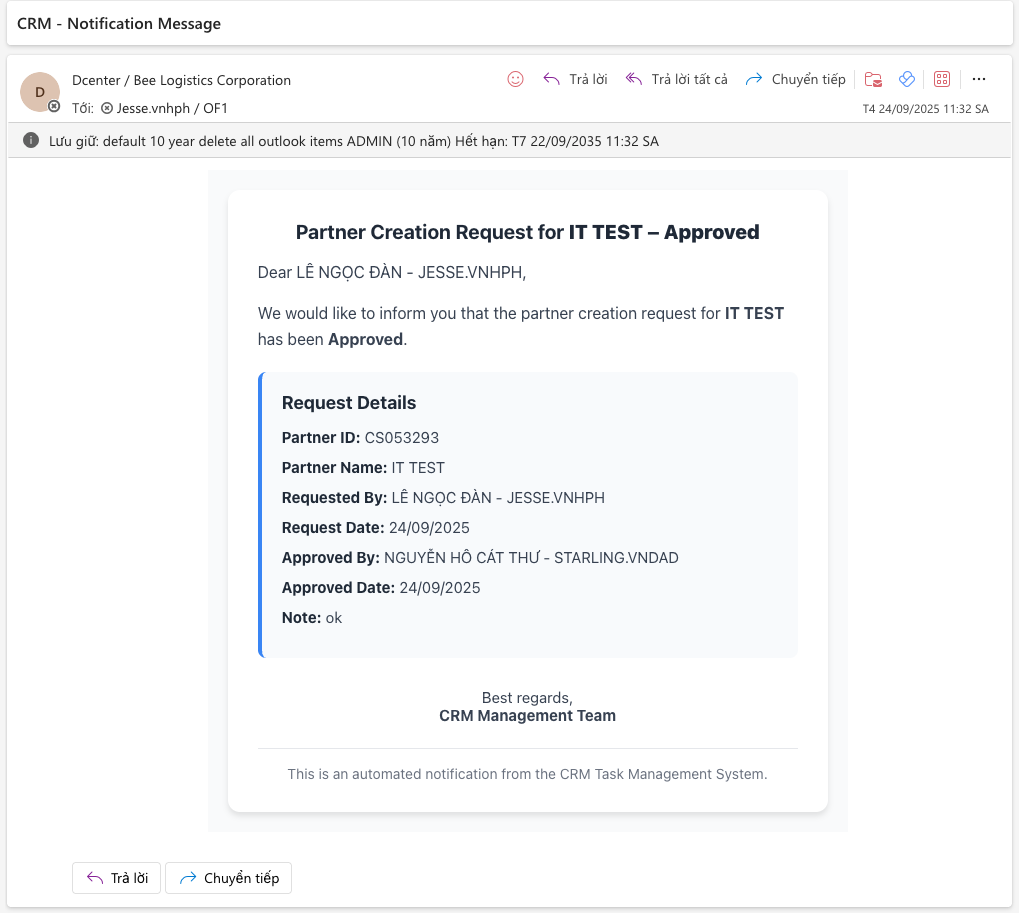
- Send email notification to requester
- Update status to "Approved"
2. Reject (Decline)
- Reject Partner creation request
- Required to enter rejection reason
- System will:
- Send email notification with rejection reason
- Update status to "Rejected"
3. Save (Save)
- Save information changes (if edited)
- Keep status as "Pending"
Video demo: https://youtu.be/GmXP60JzvQs
🔍 Search Customer

Search features:
- Search by Partner Code
- Search by Tax Code
- Search by Company Name
- Advanced filters available
🏢 Agent Management
Access Agent List Screen
- On the main screen list, click
Partners→ selectAgent Listtab.

Operations for Creating New Agent and Managing Agent are similar to Customer management.
🚛 Coloader Management
Access Coloader List Screen
- On the main screen list, click
Partners→ selectColoader Listtab.
Operations for Creating New Coloader and Managing Coloader are similar to Customer management.
💡 Best Practices
✅ Before Creating New Partner:
- Always check if partner already exists
- Verify tax code accuracy
- Ensure all required fields are completed
- Double-check contact information
🚀 For Efficient Approval Process:
- Review partner information thoroughly
- Provide clear rejection reasons
- Process requests promptly
- Maintain communication with requesters
📧 Email Notifications Include:
- Approval emails: Partner code, access instructions
- Rejection emails: Clear reasons, resubmission guidelines
- Status updates: Real-time progress notifications
📞 Support Contacts
- Technical Issues: IT Support - ext. 100
- Business Questions: CRM Admin - ext. 200
- Emergency: Manager on duty - ext. 300